|
|
File > Create milling data |
|
|
|
|
|||
|
|
|
|
|
Here you can set various parameters, you may click a parameter to see a short description.
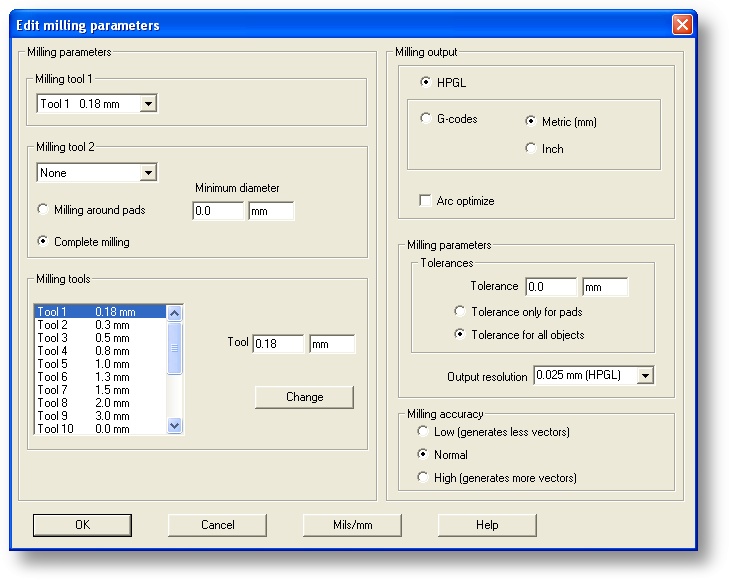
Please note that if you start milling, all existing milling data for the selected layer is removed,
this implies that adding milling object or creating rub-outs must be done only after the normal
milling is performed.
You can do a board milling with a single tool or with two tools.
Milling tool 1 is always used last in the calculation of the layer.
The milling data is first calculated with milling tool 2 (thickest) and when this is finished,
it will proceed with tool 1 (thinnest) for the area's that could not be milled by tool 2.
So it's clear that you must assign a thicker tool for milling tool 2.
Using two tools will increase the solder ability for a PCB, this makes it for students with
less soldering experience a easier to assemble the boards.
When the milling is finished you'll get the option to check the milling data, this will show possible problem area's.
You'll notice, if you look closer, that circles are in fact little pieces of lines, because
Engraver © is WYSIWYG, each line represents the smallest length that is defined in the
output protocol i.e. HPGL smallest length is 0.025 mm.